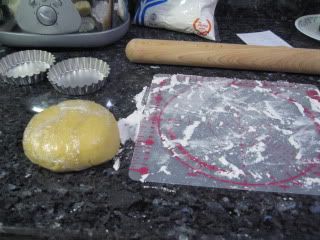
Heh, I've done this before in my previous post but I didn't write down the details of the recipe. And since I was planning to make 2 tarts, I got carried away in making my version of pineapple tarts with the extra cookie batter leftover.

This time I did poke holes on the base of the tart to prevent it from expanding but I didn't roll the first one deep enough. Ah well, you can't complain when you have a thick base anyway?
As for the custard bit, I relied on one recipe to make it...but in fact there are other ways to make it but it does depend on what desert one plans to make. If the custard is merely for pouring, I suggest adding double cream to the recipe taken from these 2 posts: traditional english custard or Making egg custard without curdling


Mine had a 2 step and only used normal milk for the first step. Second step is just mixing the custard with whip cream to get the texture I want. But I made it twice coz the first one curdled >.<. After searching on reasons why mine didn't thicken (no double cream that's why) I decided to make it again...
It so nice to have more time since it's the cny break to myself....as well as the whole kitchen too hehe.
(Courtesy of Organic Tuscany's post)
Makes 4 x 2" fruit tarts and tart has a shelf life of 4 days refrigerated
For the base
Ingredients:
- 200g plain flour
- 100g butter
- 50g sugar
- 1 egg yolk (white can be used for glazing)
- In a clean dry bowl, add flour and sugar and mix
- Cut the butter in cubes and add to the batter
- Mix until it forms into a dough (I used my hands)
- Clingwrap the dough and refrigerate for at least 30mins
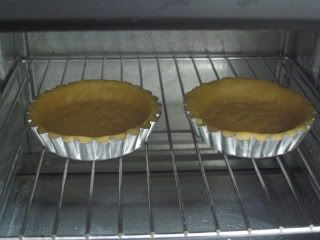
- Preheat the oven to 160°C/320°F.
- When the pastry has rested in the refrigerator, roll out to the size of the tart dish at 1cm thick.
- For a large tart tray, cover with more baking paper and weigh down with dry beans, rice, or another, smaller, baking dish or poke a few holes on the base if it's a small tart tray.
- Bake at 160°C/320°F for 15-20 minutes, until the pastry is golden. Remove the beans etc and baking paper and allow to cool.
For the custard filling
Ingredients
- 2 eggs or egg yolk
- 250ml milk or double cream
- 60g sugar
- 1 tbsp flour
- Vanilla essence
Option to use vanilla pod and icing sugar to combine sugar and flour together but this have to be carefully sieved into mixture
Method
- Split open the vanilla pod and scrape the seed with the back of a teaspoon (or pour vanilla essence) and place in a saucepan with the milk. Bring it to heat, remove it before it boils. (very very slight bubble forming at the sides of the saucepan).
- In a large bowl, vigorously beat the egg yolks with the sugar until the result is light in colour and frothy. (If using icing sugar, sieve the icing sugar and mix to avoid clumps)
- Add the milk gradually, (remove the vanilla pod, ) stirring with a wooden spoon.
- Return the mixture back into the saucepan and slowly reheat, stirring constantly and lightly only in one direction until hits simmering point.( If you run your finger along the back of the spoon through the custard, the mixture shouldn't fill the track your finger left) Check the video below:
- The custard will thicken even more once it cools. Allow to cool, covering with clingfilm to avoid a skin forming.
Assembling
- Fold whipped cream into the cooled custard. Fill the base with this and decorate with fruit.
- This pie is best enjoyed at room temperature soon after it has been made, i.e. not refrigerated.


0 comments: